Gaming PANEL ile Gaming VDS Arasındaki Farklar Nelerdir? Evet, çoğu müşterimizin en sık sorduğu sorulardan bir tanesine detalı şekilde cevap verelim. Sipariş vermeden önce nasıl bir alt yapı kullanmak istediğinize karar vermelisiniz. Karar vermenize yardımcı olmak için yazımızda detaylı şekilde size bilgi vereceğim.
Bir oyun serverı açmaya karar verdiniz ama Gaming PANEL mi seçmeliyim? yoksa Gaming VDS mi seçmeliyim? diye düşünebilirsiniz. Bu sorunun cevabını bulmanız için ilk önce Gaming PANEL ve Gaming VDS nedir onları bir öğrenelim.
Gaming PANEL nedir?
Eğer ilk defa server açıyorsanız ve çok fazla teknik bilgiye sahip değilseniz tercih etmeniz gereken yönetim sistemi Gaming PANEL olmalıdır. Çünkü Gaming PANEL sisteminde bir çok ayar otomatiktir. Yani sizin serverı ilk açtığınızda yapmanız gereken kurulumlar ve ayarlar Gaming PANEL tarafından otomatik olarak yapılmaktadır.
Gaming PANEL ile oyun serverının dosyalarını kurmanıza gerek yoktur.
Gaming PANEL ile oyun serverının dosyalarını kolayca yeniden yükleyebilirsiniz.
Gaming PANEL ile oyun serverının ayarlarını kolayca değiştirebilirsiniz.
Gaming PANEL ile oyun serverının dosyalarını otomatik şekilde güncelleyebilirsiniz.
Bu liste uzarda gider. Siz ana noktayı anladınız. Gaming PANEL kullanımı kolaydır. Gaming PANEL ile teknik kısmı düşünmenize gerek yoktur.
Gaming VDS nedir?
Eğer daha önce server açmışsanız ve server konusunda bilginiz varsa tam size gerekli olan server yönetim sistemidir. Çünkü Gaming VDS sistemi ile serverınızın tüm ayarlarına erişebilirisniz. Tam kontrol size aittir. İstediğiniz gibi her dosyaya müdahale edebilirsiniz. Kendi bilgisayarınız gibidir. Uzak masaüstü erişimi ile Gaming VDS’e bağlanıp gerekli her türlü kurulumu yapabilirsiniz.
Gaming VDS’de tüm kurulum müşteriye aittir. Oyun serverının dosyalarını kurmak, Oyun serverının dosyalarını güncellemek veya Oyun serverının ayarlarını yapmak gibi tüm işlemler kullanıcı tarafından gerçekleştirilebilir.
Gaming VDS ile istediğiniz oyun serverını kurabilirsiniz.
Gaming VDS ile istediğiniz ayarı yapabilirsiniz.
Gaming VDS ile server kontrolü ve tam erişimi size aittir.
Gaming VDS ile 2. bir bilgisayara sahip olursunuz.
Bu liste uzarda gider. Gaming VDS ileri düzey kullanıcılar içindir. Oyun serverınızı açacağınız evinizde kullandığınız 2. bir bilgisayar gibidir, güçlüdür ve işlevseldir.
Hypixel. Have you ever heard news from them? Probably yes because you are reading this article right now.
So, what is Hytale?
Hytale is a Minecraft-Like game which will be created from Hypixel. Hypixel is the biggest Minecraft server in the history. They have lots of mini games, fun games and more. You can play with your friends for free! Server’s IP address is: hypixel.net
As a result of being best Minecraft server, they decided to create a completely new game; Hytale! Hypixel has BIGGEST team in the Minecraft universe. They tried all plugins, all mods, all methods to make Minecraft a better game. Now, it looks like this was simply not enough for them. They are creating an awesome game, HYTALE!
Hytale will have awesome mini games, big games, multiplayer and single player games inside. Graphics will be awesome and there will be various monsters in game. As you know, in normal Minecraft, there are not much monsters which you can fight. But in Hypixel, we are going to see lots of different monsters and we will be able to fight with them. We will get inside awesome caves, we will discover new places and more! Actually, we are really excited about how Hytale will become after release. Hypixel team didn’t revealed lots of information about game, so all we can do is just imagine, we can’t do anything more than that.
So, we are going to play an awesome game as soon as possible in future. They are working hard and they’re give us some information about incoming game. Let’s wait and see this amazing game!
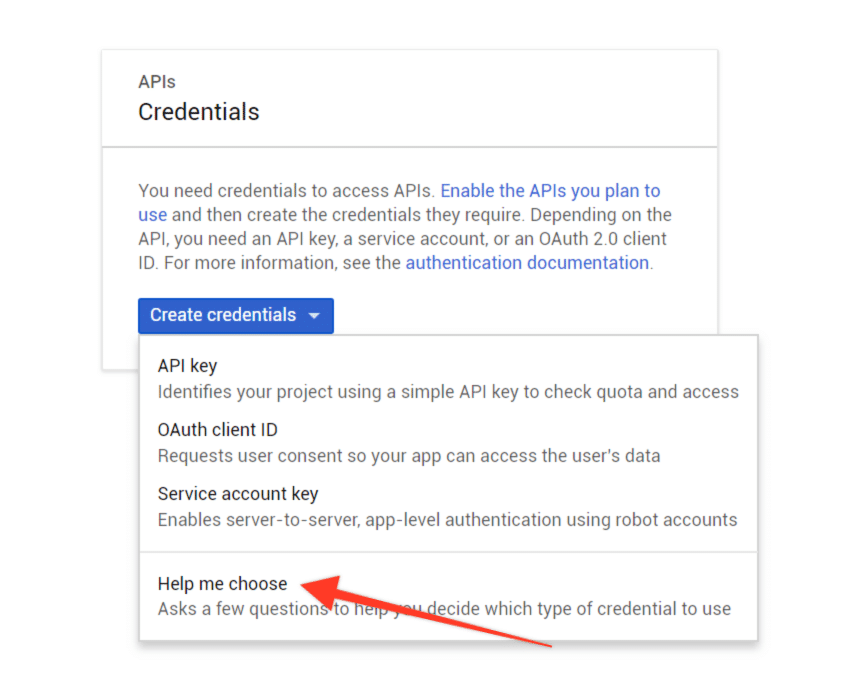
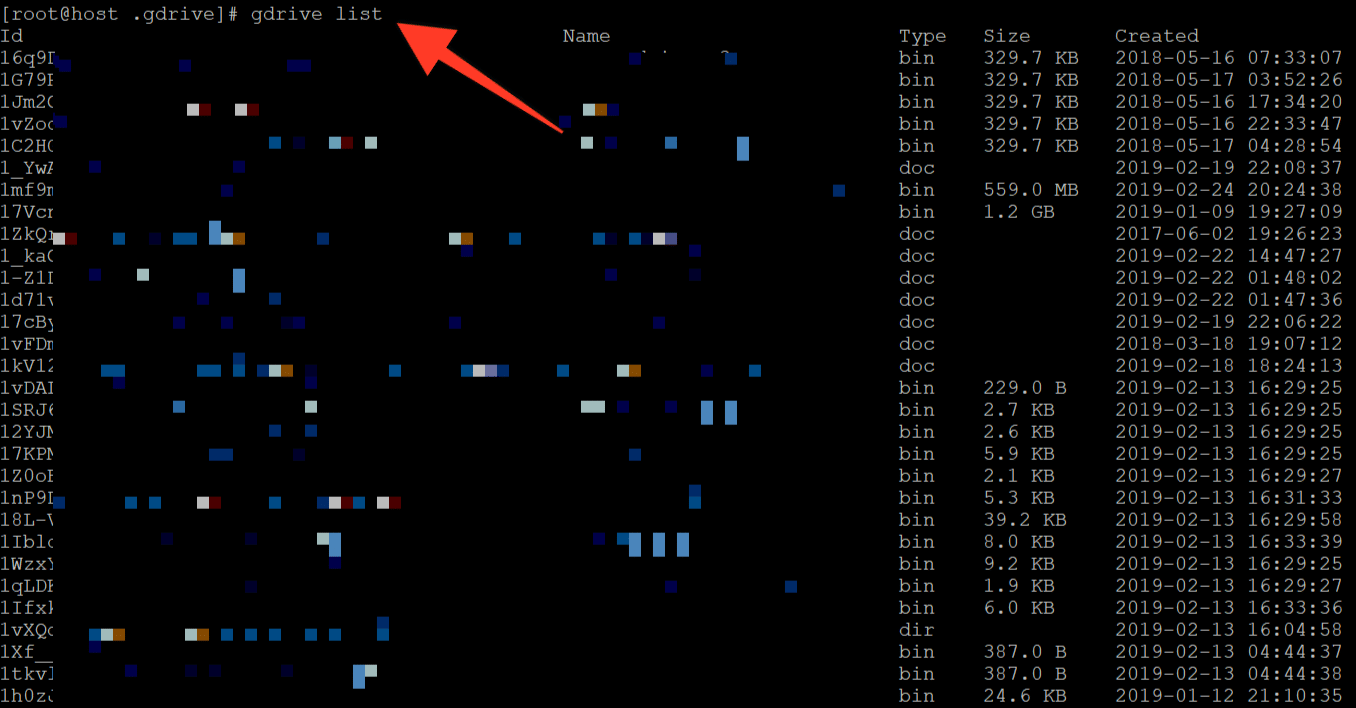
If you are getting; googleapi User Rate Limit Exceeded, gdrive 403 Rate Limit Exceeded we have a solution for you.
We have been using Gdrive to upload some of our essential files for many months. Recently, we noticed that our daily backup was not working as expected. Gdrive error logs show us, Failed to get file: googleapi: Error 403: Rate Limit Exceeded, rateLimitExceeded and Failed to get file: googleapi: Error 404: File not found: Failed., notFound errors.
We tried rebooting our servers refreshing our auth logins etc. none of them fixed our gdrive User Rate Limit Exceeded errors. The problem was an API related issue so we need to create a new API and build Gdrive from source. The solution is simple but takes times, If you are figuring out how to do it. However, It took a couple of our hours to do it but it will take minutes of your time, if you follow this guide you will solve your google drive 403 Rate Limit Exceeded error.
PS: We applied all the steps on our Centos server, but it will be the same with all platforms.
Part 1
Carefully follow the steps to fix google drive User Rate Limit Exceeded Error.
Downloading and Installing GO
You will need root privileges or sudo for ubuntu.
Download the files :
To download the Go binary on your linux server you can use wget or curl:
You need to extract Go binary files from go1.11.5.linux-amd64.tar.gz After successful extraction; you will have a go named folder. You should move it to /usr/local location because it is recommended by publishers.
tar -xzf go1.11.5.linux-amd64.tar.gz
mv go /usr/local
Creating Workspace Folder for Go
For better-organized projects, create a projects folder with bin and src folder together in user home directory.
mkdir -p ~/projectss/{bin,src}
Setting Environment Variables for Go
We need to set a $PATH Environment variable for Go to use it like any other commands in our UNIX system.
Create path.sh script in /etc/profile.d directory location
nano /etc/profile.d/path.sh
Add the following to the file, save and exit. (/etc/profile.d/path.sh)
/usr/local/go/bin
Additionally, we need to define GOPATH and GOBIN Go environment variables in the user’s .bash_profile file to point to the recently created projects folder. GOPATH is our Go source files GOBIN is our compiled Go binary files. Open the .bash_profile file:
nano ~/.bash_profile
Append the following to the end of the file, save and exit: (~/.bash_profile)
Apply to changes in our system; we need to update profiles with source command
source /etc/profile && source ~/.bash_profile
Let’s test our Go if it is working
[root@host ~]# go version
go version go1.11.5
linux/amd64
We needed to have Go in our system to compile Gdrive so that’s all for installing Go. We can continue Part 2 where we will compile Gdrive from source files.
Part 2
We will continue to solve googleapi 403 Rate Limit Exceeded error. Keep following the steps…
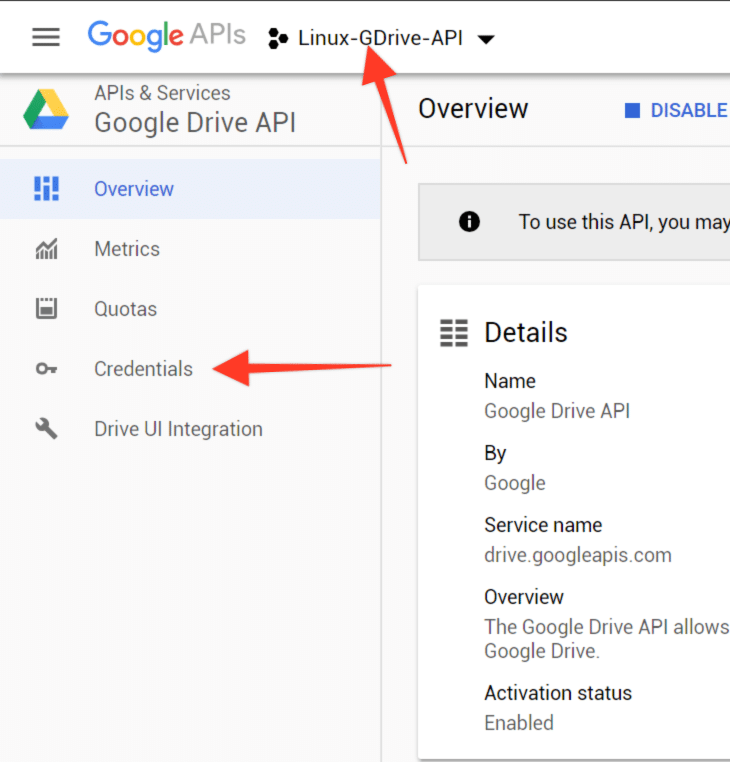
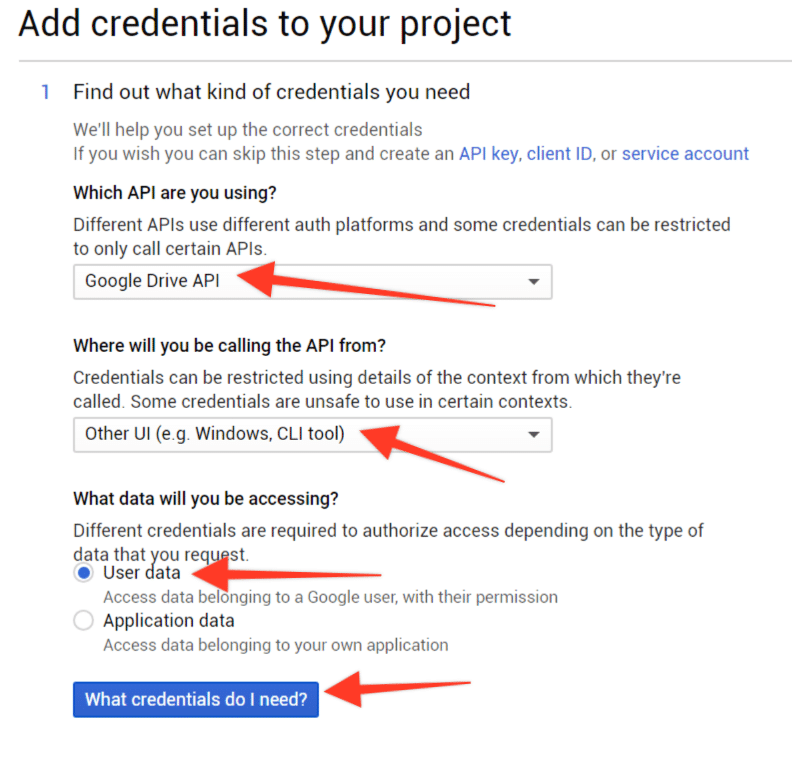
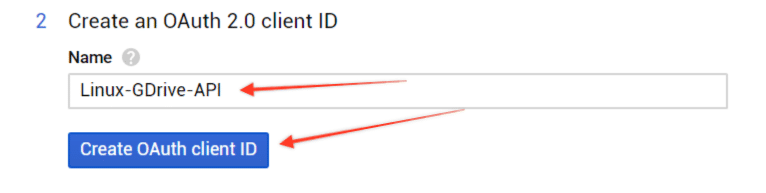
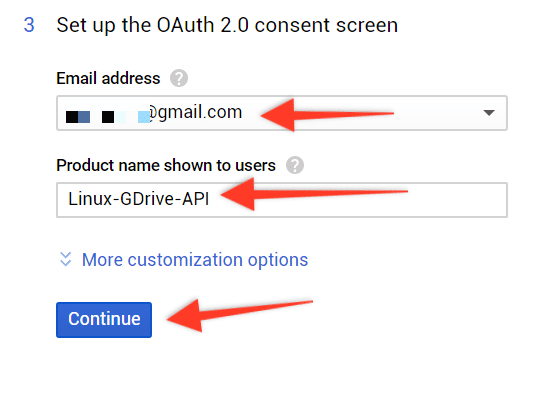
Creating Google API for Gdrive
If you see these errors while running Gdrive on your system:
Failed to get file: googleapi: Error 403: Rate Limit Exceeded, rateLimitExceeded
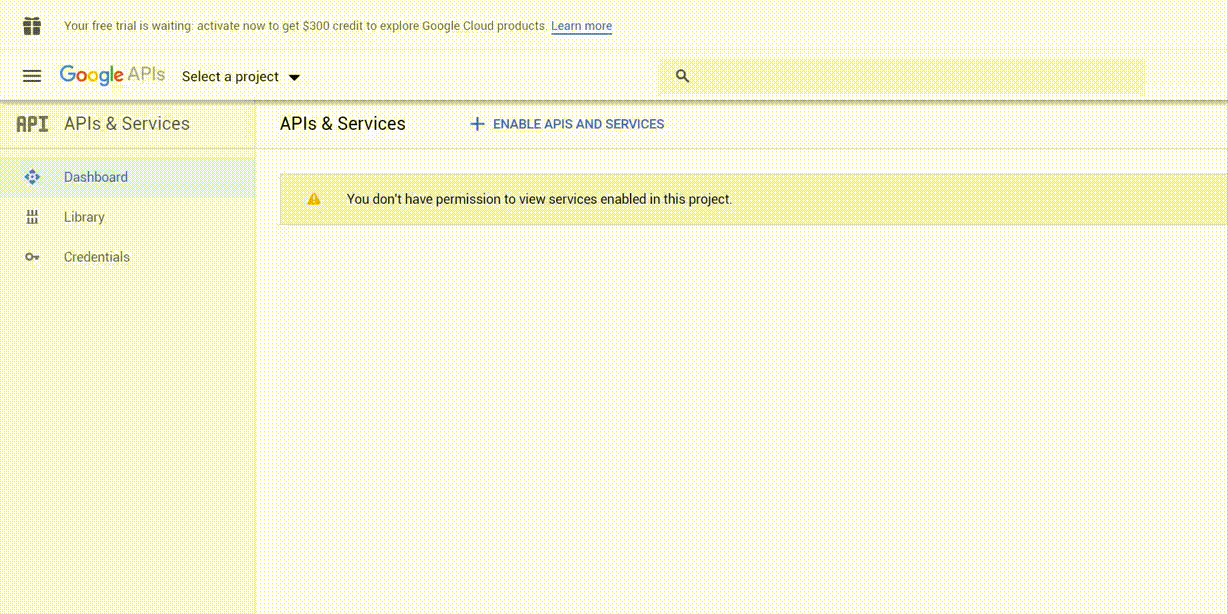
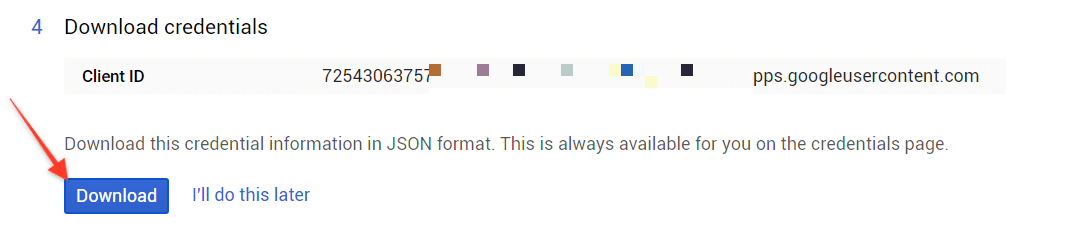
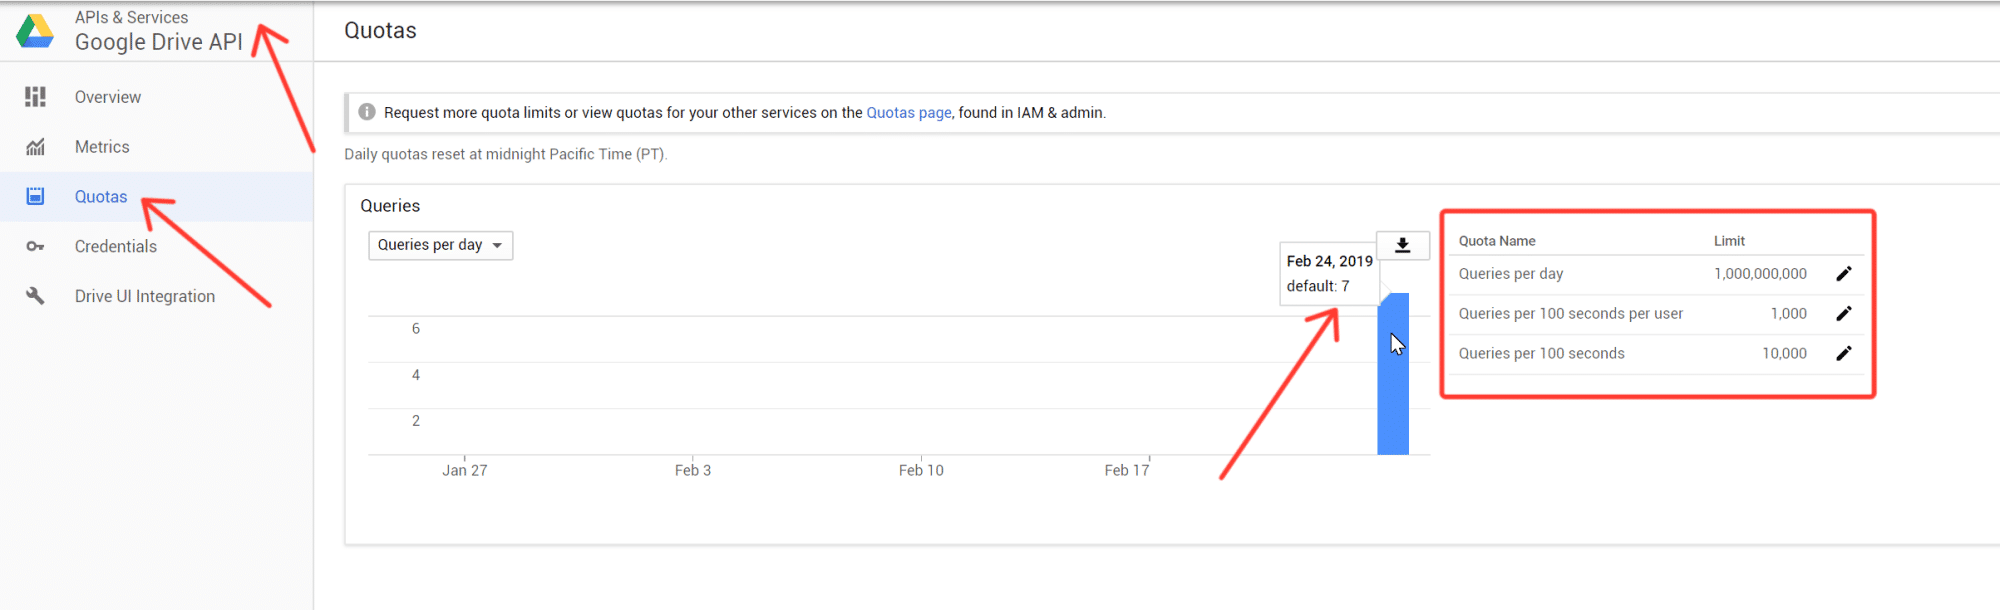
You need your own Google Drive API to use with Gdrive so you can get information from your usages. Google API’s provide Quotas Information which is very helpful in our situation. We need to know if we Exceed our limits.
Minecraft maceralarınızda yardımcı olabilecek yenilikler geliyor oyuna bu güncelleme ile. Minecraft oyununa sahip olanların tamamen bedava oynayabileceği bu güncelleme ile maceralarınıza yenilikler katın! Efsanevi eşyalarınızı taşıması için artık lamalar var. Bu lama’lara sandık bağlayabiliyor ve yanımızda gezdirebiliyoruz. Maceralarımız sırasında bulduğumuz şeyleri yanımızda taşıma konusunda problem de yaşamıyoruz böylece. Ayrıca lamalar bizi koruyabiliyor. Yaklaşan düşmanlara tükürerek onları öldürebiliyorlar bile! Ne kadar iğrenç de olsa işe yarayacağı kesin!
Haritada yeni bölgeler de var artık. İçinde köylerdeki köylülerin kötü kuzenlerinin yaşadığı Orman Köşkleri ve dikenli koruyucular tarafından etrafı sarılı Okyanus Anıtları. Bu iki alanın da fethi zor ama ödülleri tatmin edici. Köylülerin kötü kuzenleri sizlere yerden kazıklar çıkarmak veya kendilerine küçük çirkin yardımcılar çıkarmak gibi büyüler kullanabilir veya baltalarını kafanıza vurmak için üstünüze koşabilir. Bu durumlara hazırlıklı gitmenizi öneriyoruz. Eğer bu arkadaşları başarıyla alt edebilirseniz çok özel bir ödül sizleri bekliyor; Ölümsüzlük Totemi. Bu totem sizi ölümden kurtarabilen tek eşya! Ama unutmayın; ölmeden önce bu eşyayı elinizde tutuyor olmanız gerekiyor! Yani kazanamayacağınızı anladığınız bir savaştan kaçarken ya da muzip bir arkadaşınız sizi uçurumdan aşağı ittiği zaman bu eşyayla bakışmanız gerekiyor.
Peki bu yerleri ve daha pek çoğunu nasıl bulacaksınız? Yeni gelen köylü ile! Haritacı olan bu köylü size pusula ve zümrüt karşılığında hazine gösteren bir harita veriyor. Bu haritayı takip ederek zenginliğe giden yolda zorluklara göğüs gerip adınızı tüm dünyaya duyurabilirsiniz!
Oyuna gelen yeniliklerden biri de Shulker Kutusu. Bu kutu normal kutulardan farklı olarak kırıldığında içindekileri fırlatmıyor, içinde tutmaya devam ediyor. Yerden alıp envanterinizde eşyalarla birlikte taşıyabiliyorsunuz. Bir nevi sırt çantası olarak düşünebilirsiniz. Dispanserler bu kutuyu yere koyuyor ve pistonlar kırıyor. Hunilerin üstüne koyulursa huniler içini boşaltıyor, eğer üzerine eşya olarak bırakırsanız huniler eşya olarak kutuyu alıyor ve ucu nerdeyse oraya bırakıyor. Kırmızı taş sistemleri için işe yarayacağı kesin!
Bu yeni özellikleri deneyebileceğiniz bir dünya örneği de mevcut! Denemek için hemen indirin:Kayıp Medeniyet