How to install DirectAdmin on Centos 8
I decided to install DirectAdmin on Centos8 for my new server. I bought a new license and SSL Certificate too. I have been using DirectAdmin on my Centos 7 server for a few years and I love it. As you know Centos EOL is 2024 it is not soon but still I want to use newer OS system so that is why I choose to install DirectAdmin on Centos 8.
This guide covers general steps to install DirectAdmin on Centos 8. If you have any questions regarding the steps just contact me on discord. (Bottom of the page)
I freshly installed Centos 8 on my VDS server. I set up my hostname during installation still need to check the server hostname.
Command to chek server hostanme
uname -n
hostname
Here is the output from my server:+

Seems right. Lets move on.
Make sure your domain hostname is the same one you got the DirectAdmin license for. If it is not you can change it with this command:
hostnamectl set-hostname hostname.yourdomain.comAfter that you can verify if you corrently change it with this command:
hostnamectl status
After that let’s update our Centos 8 Server because we just installed it.
Command to update server
yum update -y
After the update is finished, please follow these steps to add these repositories. We need them for the new version of PHP 7.4 and Memcached extension. Also, you can follow these commands to enable PowerTools On your centos 8 servers.
yum clean all
yum -y install yum-utils wget gcc gcc-c++ flex bison make perl-libwww-perl perl-DBI bind bind-libs bind-utils libaio libcom_err-devel openssl openssl-devel perl quota libcurl-devel gd zlib-devel zip unzip libcap-devel cronie bzip2 cyrus-sasl-devel perl-ExtUtils-Embed autoconf automake libtool which patch mailx bzip2-devel lsof glibc-headers kernel-devel expat-devel psmisc net-tools systemd-devel libdb-devel xfsprogs rsyslog logrotate crontabs file kernel-headers nano cmake cmake3 sysstat mlocate bc
# EPEL & Remi YUM repo
dnf install https://dl.fedoraproject.org/pub/epel/epel-release-latest-8.noarch.rpm
dnf install https://rpms.remirepo.net/enterprise/remi-release-8.rpm
# disable Remi & EPEL by default and only enable manually when needed
yum-config-manager --disable remi epel
yum -q list jq nghttp2 redis memcached memcached-devel libmemcached-devel libmemcached screen GeoIP-devel GeoIP --enablerepo=powertools,epel,remiyum -y install jq nghttp2 redis memcached memcached-devel libmemcached-devel libmemcached screen GeoIP-devel GeoIP --enablerepo=powertools,epel,remi
updatedbWe installed everything we need. We have to disable the SELINUX:
Command to update server
Disabling SELINUX
setenforce 0
sed -i 's|enforcing|disabled|g' /etc/selinux/config
After all these updates and SELINUX changes we have to reboot our server.
Command to reboot the server
rebootOur server is ready lets install DirectAdmin on Centos 8
First we need to create a folder to store our install scripts. After that give execution permiosn the script.
mkdir -p /root/tools
cd /root/tools
wget -4 https://www.directadmin.com/setup.sh
chmod 755 setup.sh
Our DirectAdmin install file is ready bu we should to get ready our DirectAdmin Licence Iformatin before starting to install DirectAdmin. Because it will ask us during installation.
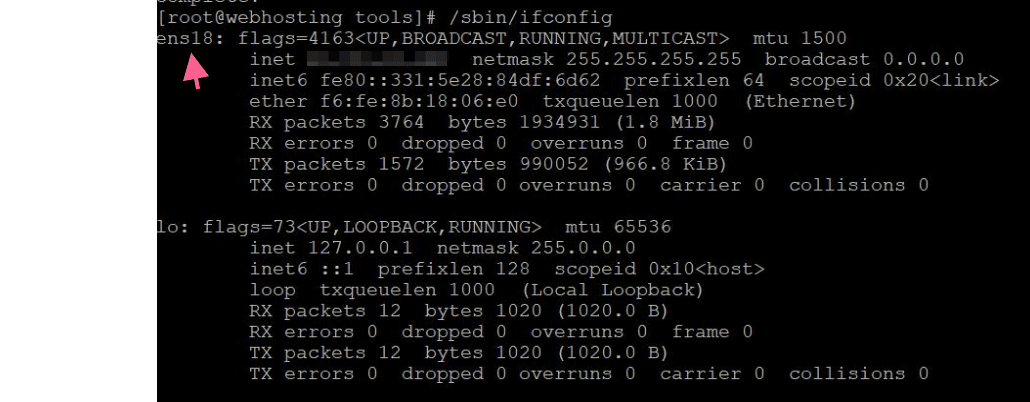
Also you have to know your server’s interface name. You can learn with this code:
Command to get server’s entherent interface name
/sbin/ifconfigOutput of the command:
Make sure your hostanme is like subdomain.domain.com otherwise it make things corrupt durinf the installation.
Before it will ask you :
Would you like to install these required pre-install packages? (y/n): y
You can see DirectAdmin asks Client ID, License ID and Hostname. If you don’t have license you should buy one from https://www.directadmin.com/
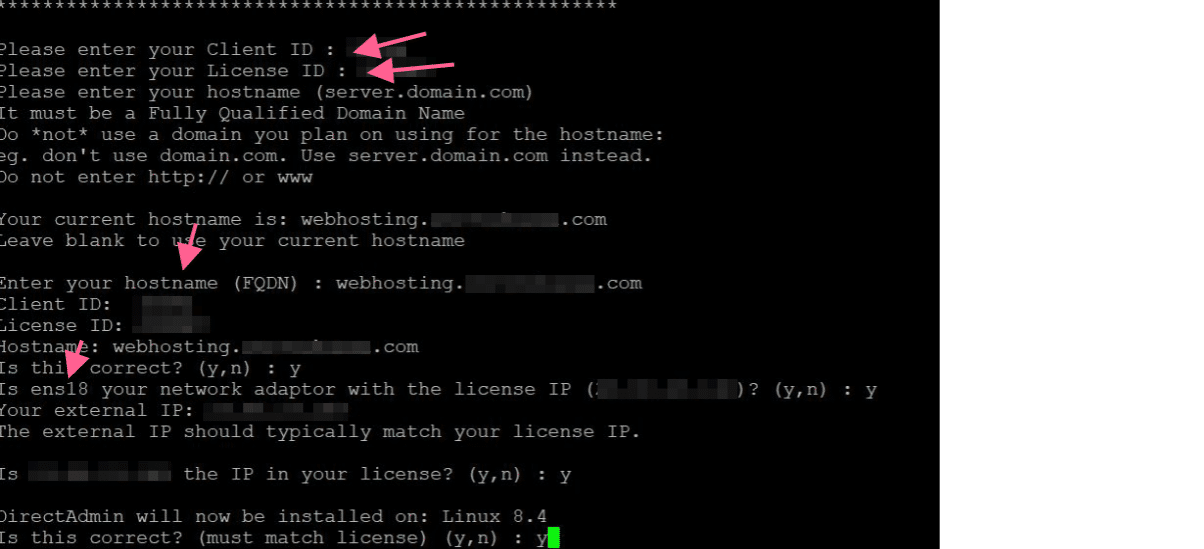
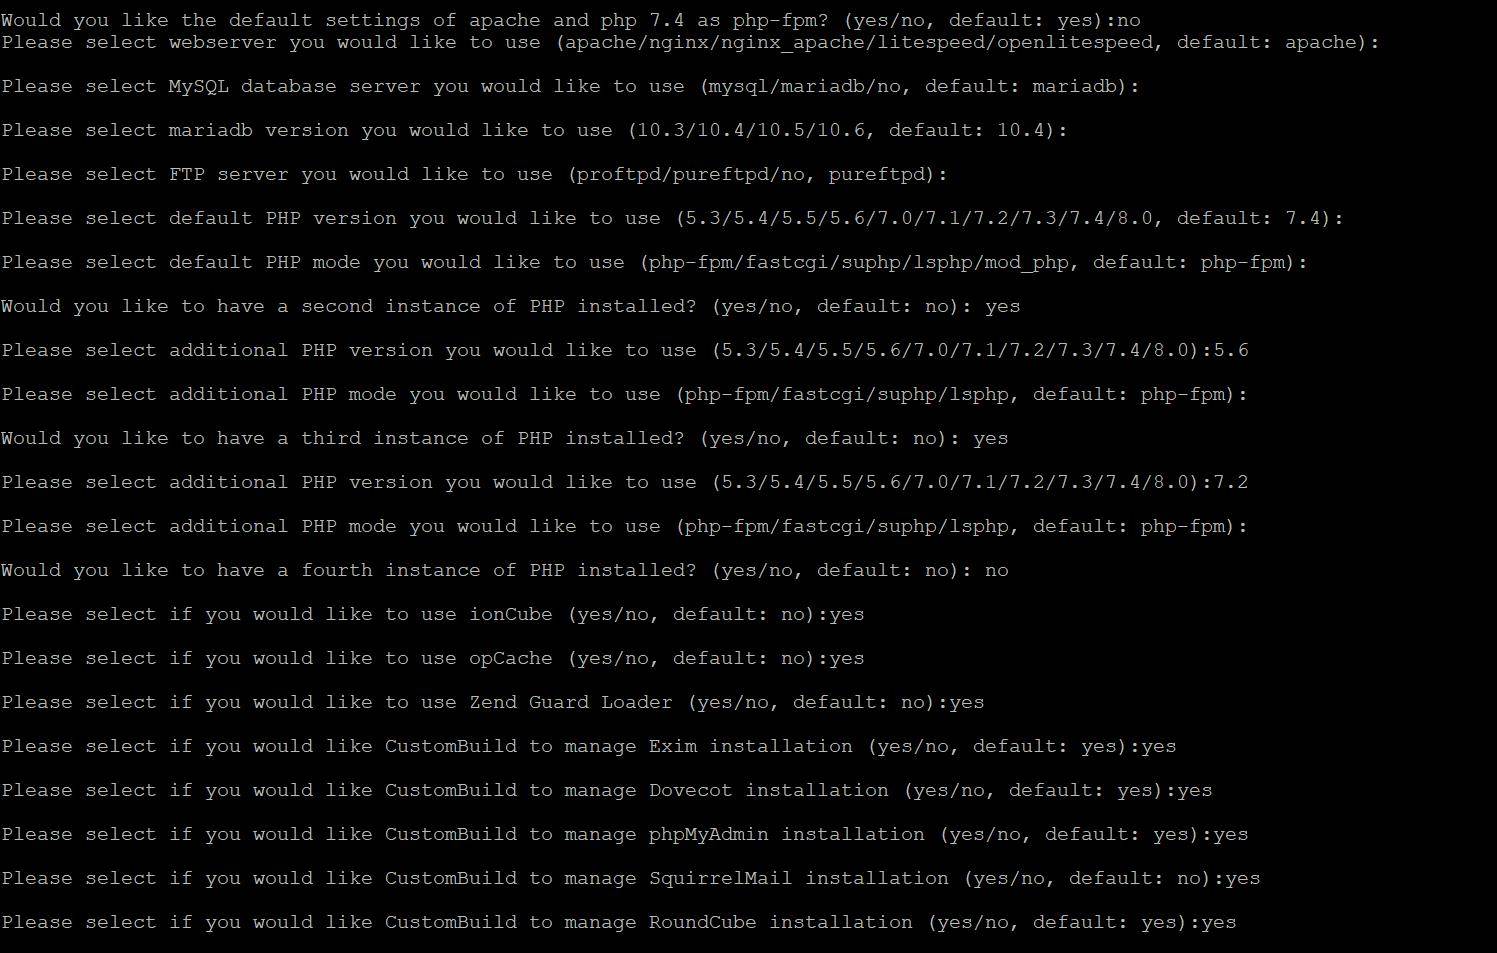
Also I want to choose php version myself so I said no for the first question
Would you like the default settings of apache and php 7.4 as php-fpm? (yes/no, default): n
Here my answers: (If you see empty answers it means i chose default.)
After all questions finished DirectAdmin installation starts on Centos 8 server. Installiation takes times depends on your server power.
Installation continues in screenmode :
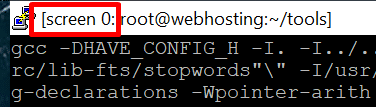
If you disconnected from current SSH connection you can reattached the directadmin install screen with this code:
screen -r directadmin
Get screen ID and Detached
screen -D IDofYourScreen.directadminAfter that,
screen -r directadmin
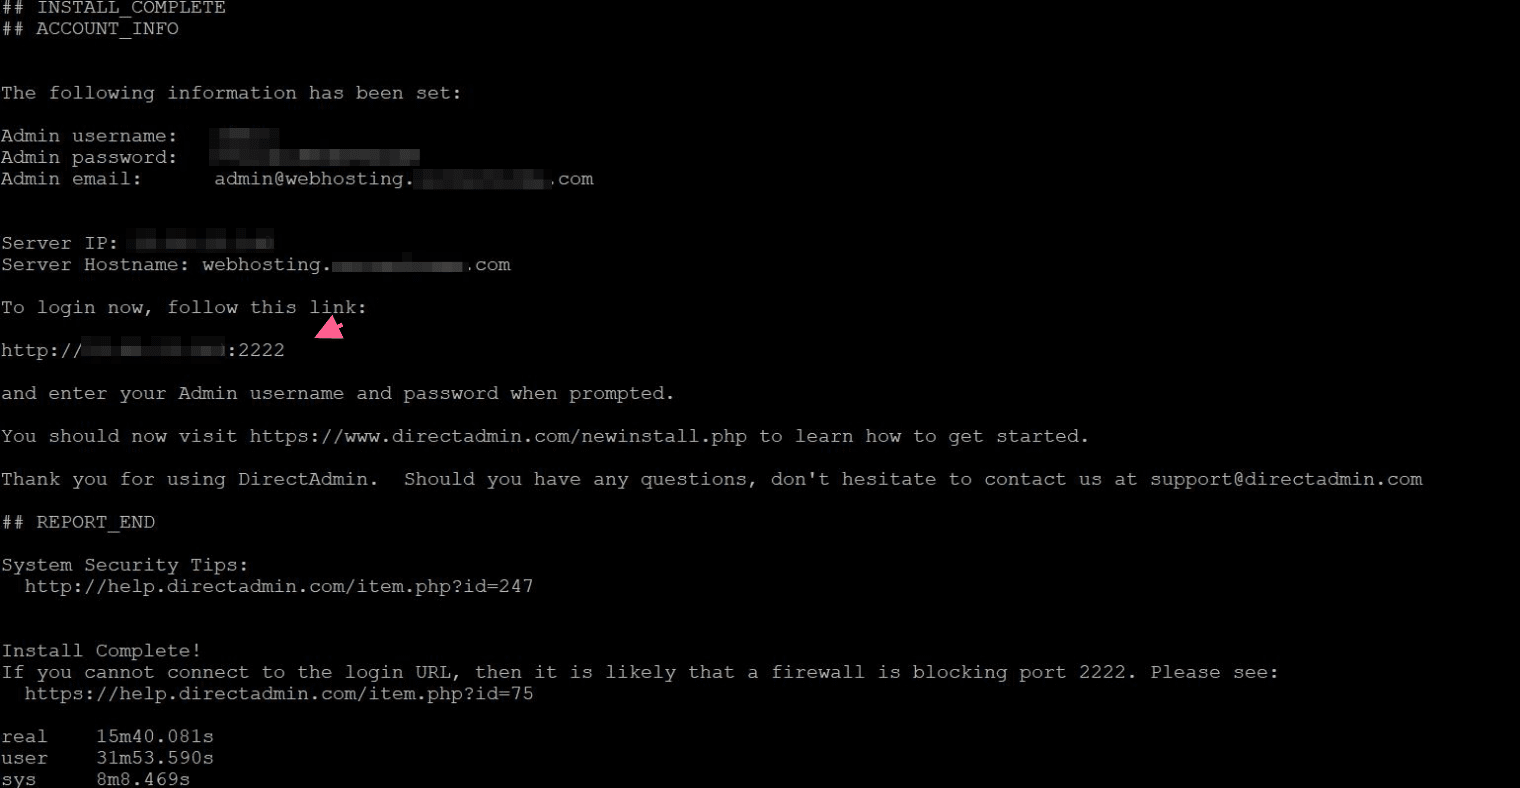
After installiation finised if you didn’t lost your ssh connection you can use exit command to log out from screen session.
Setup will give you directadmin login information , after it finish. However you can’t connect DirectAdmin panel unless you disable you firewall or enable 2222 port access.
Command to disable fireall
firewall-cmd --permanent --zone=public --add-port=2222/tcpCheck the firewall status :
service firewalld statusif its active and you just allow 2222 port lets see if it works:
firewall-cmd --zone=public --list-portsif you get empty after this command you need to reload the firewall to apply changes
firewall-cmd --reload After that you can see the port is allowed Output:
[root@webhosting ~]# firewall-cmd --zone=public --list-ports
2222/tcp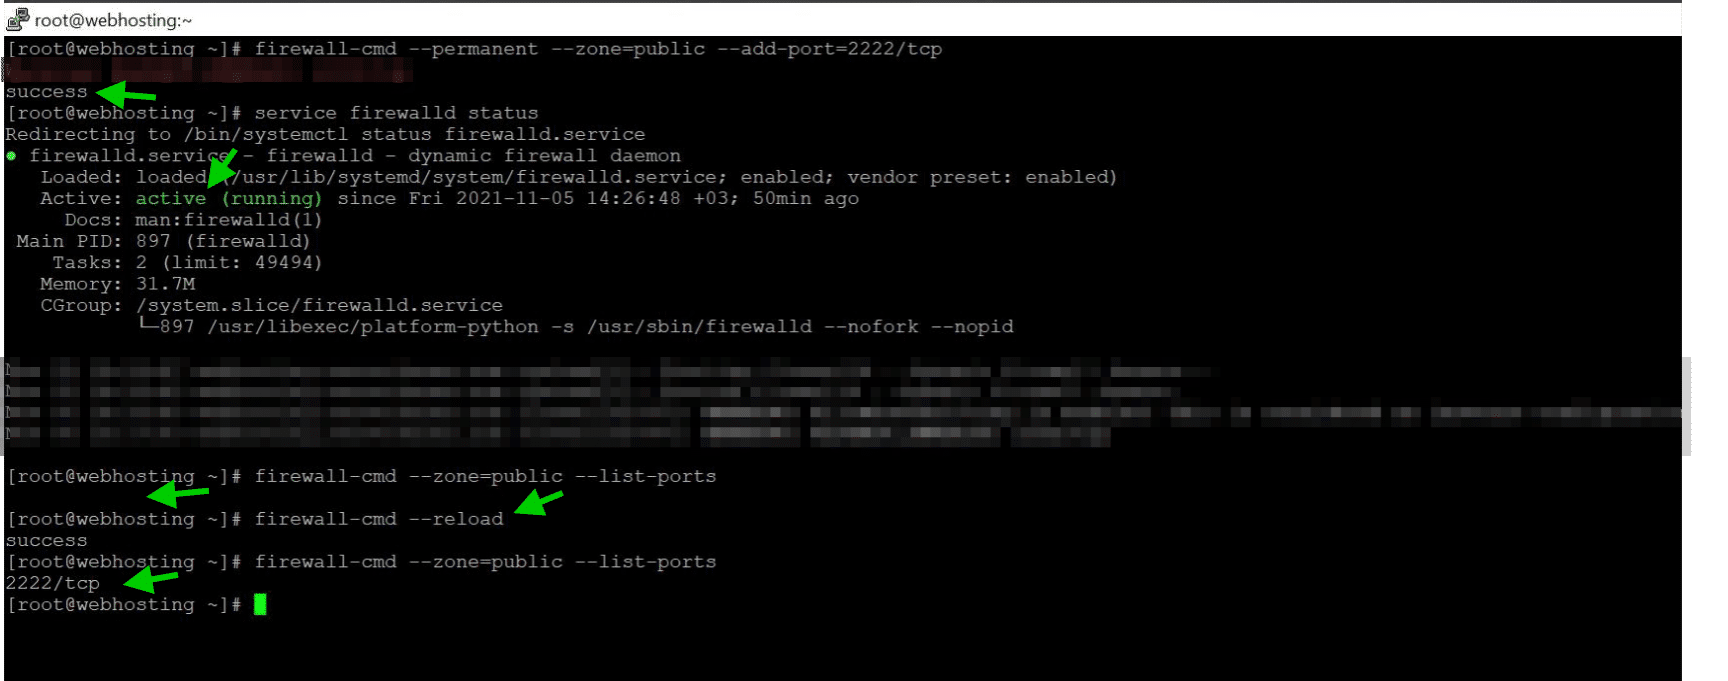
Lets enable other ports and services with firewall-cmd
firewall-cmd --permanent --zone=public --add-port=22/tcp
firewall-cmd --permanent --zone=public --add-port=2222/tcp
firewall-cmd --permanent --zone=public --add-port=9418/tcp
firewall-cmd --permanent --zone=public --add-port=35000-35999/tcp
firewall-cmd --permanent --zone=public --add-service=dns
firewall-cmd --permanent --zone=public --add-service=ftp
firewall-cmd --permanent --zone=public --add-service=http
firewall-cmd --permanent --zone=public --add-service=https
firewall-cmd --permanent --zone=public --add-service=imap
firewall-cmd --permanent --zone=public --add-service=imaps
firewall-cmd --permanent --zone=public --add-service=pop3
firewall-cmd --permanent --zone=public --add-service=pop3s
firewall-cmd --permanent --zone=public --add-service=smtp
firewall-cmd --permanent --zone=public --add-service=smtps
firewall-cmd --permanent --zone=public --add-service=smtp-submission
firewall-cmd --reload
firewall-cmd --zone=public --list-ports
firewall-cmd --zone=public --list-services
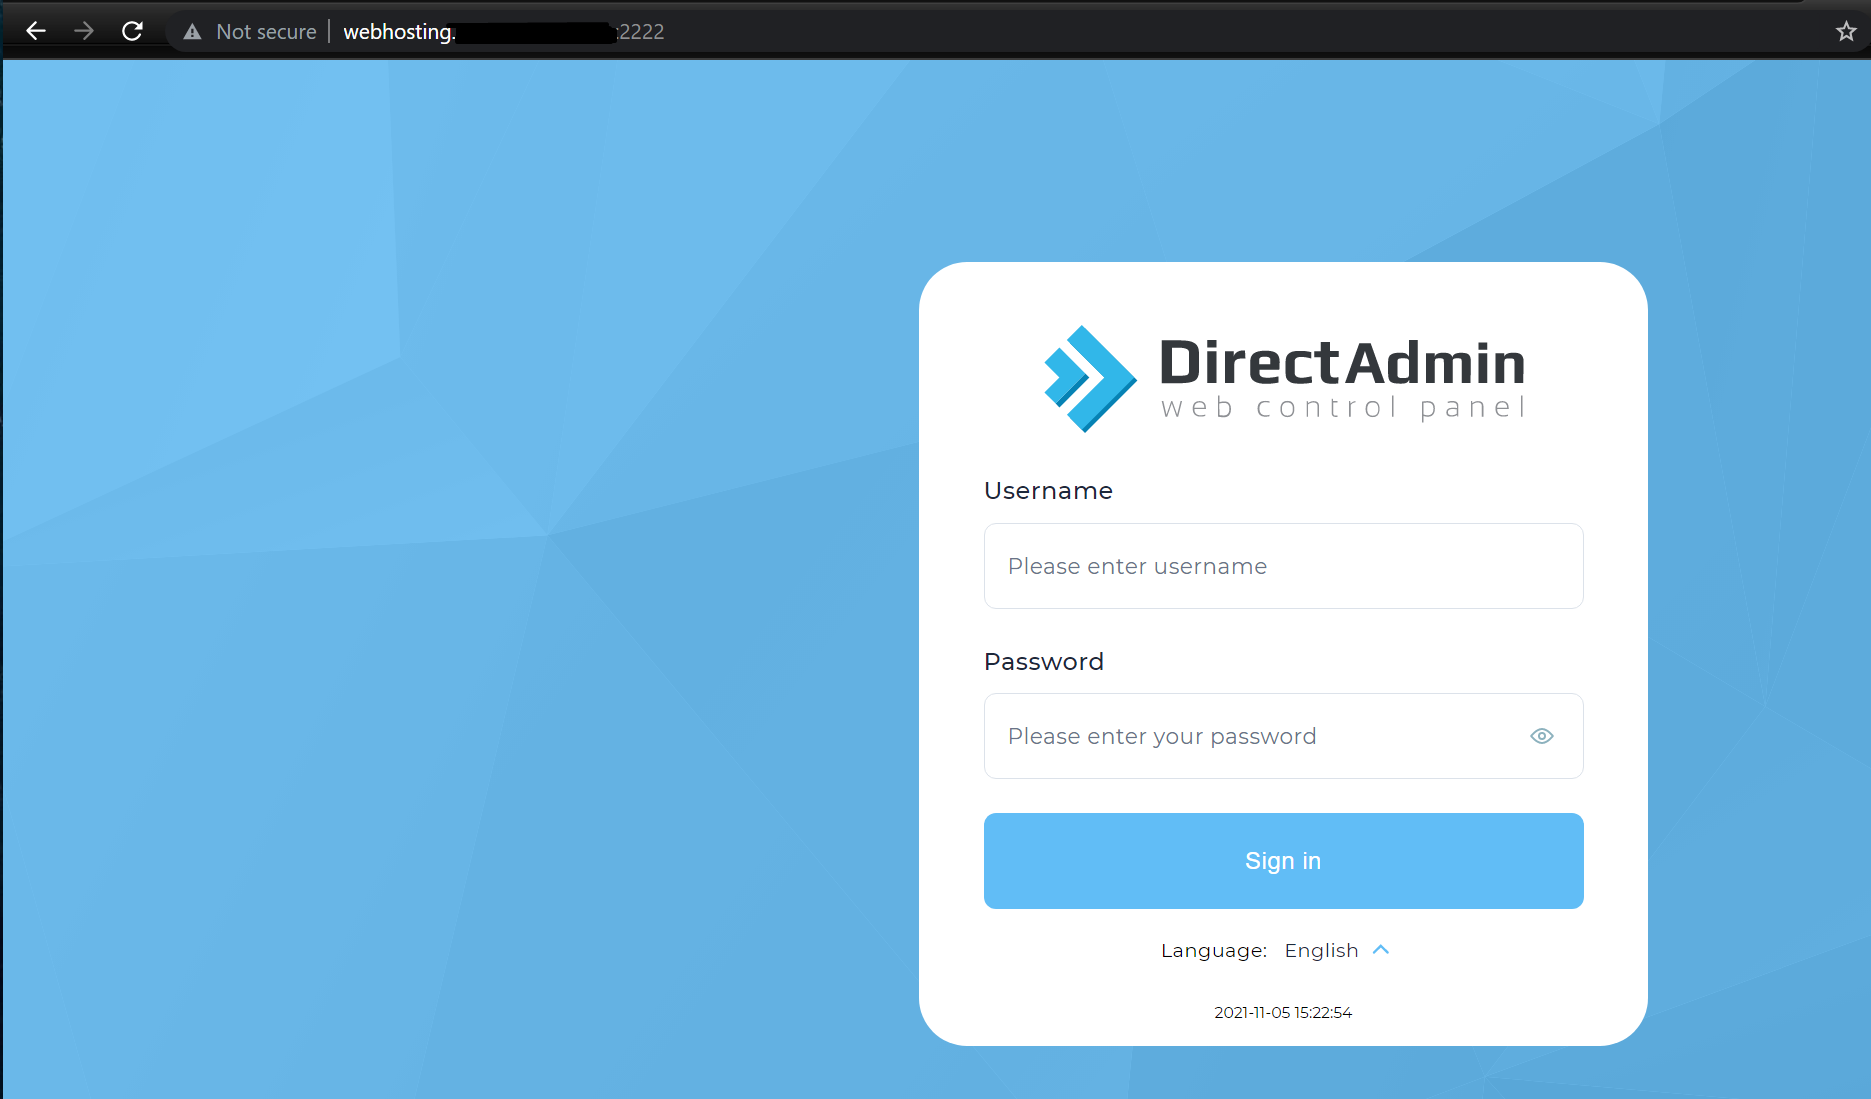
You can check if you can access your direct admin panel : http://subdomain.domain.com:2222
Post-Install DirectAdmin Configuration
Our DirectAdmin Server is ready but we need to do some tweaks for better security and performance.
First, Apache settings ServerSignature is already set to Off so nothing to change. ServerTokens should be changed from Major to Prod. Follow the commands.
Check Apache settings:
egrep '^ServerTokens|^ServerSignature' /etc/httpd/conf/extra/httpd-default.confServerTokens Major
ServerSignature OffReplace the settings :
sed -i 's|^ServerTokens .*|ServerTokens Prod|' /etc/httpd/conf/extra/httpd-default.conf
sed -i 's|^ServerSignature .*|ServerSignature Off|' /etc/httpd/conf/extra/httpd-default.conf
After that verify the changes in Apache settings:
egrep '^ServerTokens|^ServerSignature' /etc/httpd/conf/extra/httpd-default.conf
ServerTokens Prod
ServerSignature Off
DirectAdmin overwrites config files after every updates. Thus, we need to crate a custom folder for extra config files to prevet DirectAdmin overwrite our custom settings.
cd /usr/local/directadmin/custombuild/
mkdir -p custom/ap2/conf/extra/
cp -p /etc/httpd/conf/extra/httpd-default.conf /usr/local/directadmin/custombuild/custom/ap2/conf/extra/
cp -p /etc/httpd/conf/extra/httpd-mpm.conf /usr/local/directadmin/custombuild/custom/ap2/conf/extra/
Let’s test our config file if it is free from any syntax error:
httpd -tSyntax OKDon’t forget to restart the Apache service
service httpd restart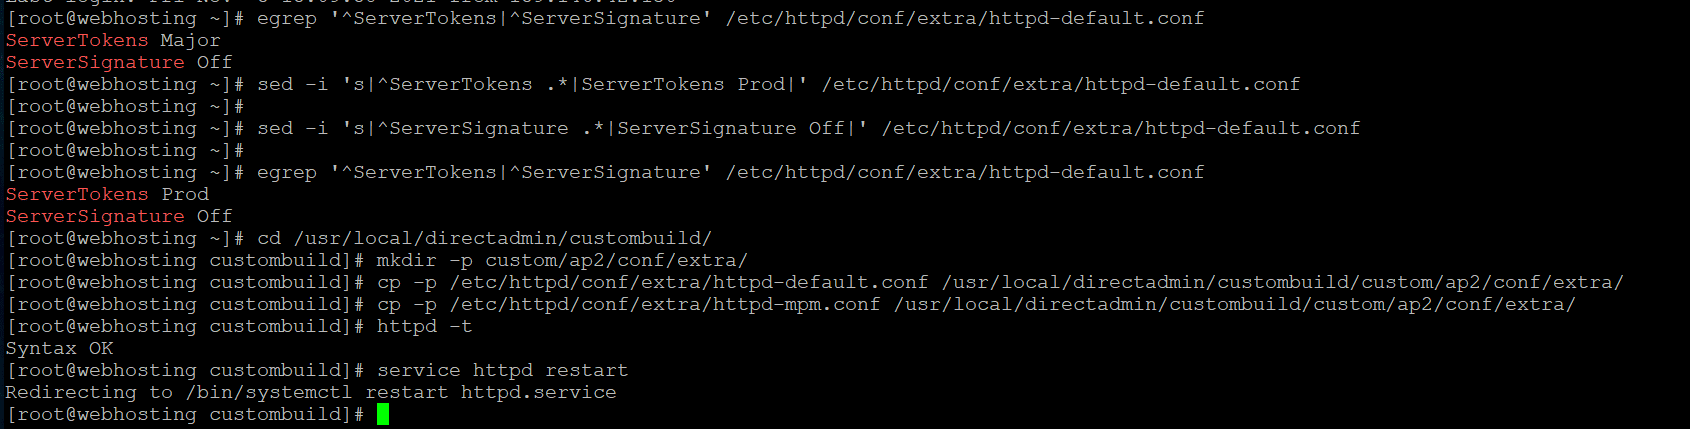
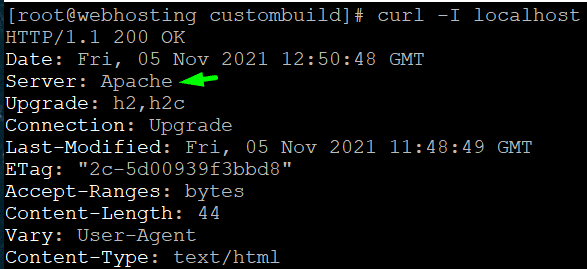
Apache version information is hidden now:
lets set up directadmin notifications for updates:
options.conf includes cron settings for notifications. File is under /usr/local/directadmin/custombuild
Open with editor:
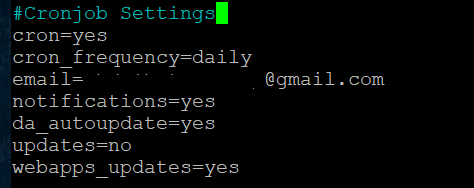
nano /usr/local/directadmin/custombuild/options.confChange settings as you wish. Don’t forget to change email.
#Cronjob Settings
cron=yes
cron_frequency=weekly
[email protected]
notifications=yes
da_autoupdate=yes
updates=no
webapps_updates=yes
after made changes, type:
./build cronIt will write your settings.
Example output:
Cronjob is set for MYEMAILADDRESS:
Cronjob frequency: weekly
Automatic notifications: yes
Automatic updates: no
Directadmin we need to disable username access for security. ( Disable /~username access )
Use CustomBuild 2.0 for that. Follow the commands:
cd /usr/local/directadmin/custombuild
./build set userdir_access no
./build rewrite_confs
We can install many addons with CustomBuild 2.0. For exmaple ClamAV, maldet, AWStats or php modules..
Security if most important thing and Directadmin files are important to keep clean. Thus, We will install scaning modules.
Installing ClamAV with CustomBuild 2.0. Also for emails, we will add Exim ClamAV support.
cd /usr/local/directadmin/custombuild

./build update
./build set clamav yes
./build set clamav_exim yes
./build set exim yes
./build set eximconf yes
./build set eximconf_release 4.5
./build clamav
./build exim
./build exim_conf
After that, we can install Maldet
cd /usr/local/src
wget -4 http://www.rfxn.com/downloads/maldetect-current.tar.gz
tar -zxvf maldetect-current.tar.gz
cd $(ls -1d maldetect-*/ | tail -1)
./install.sh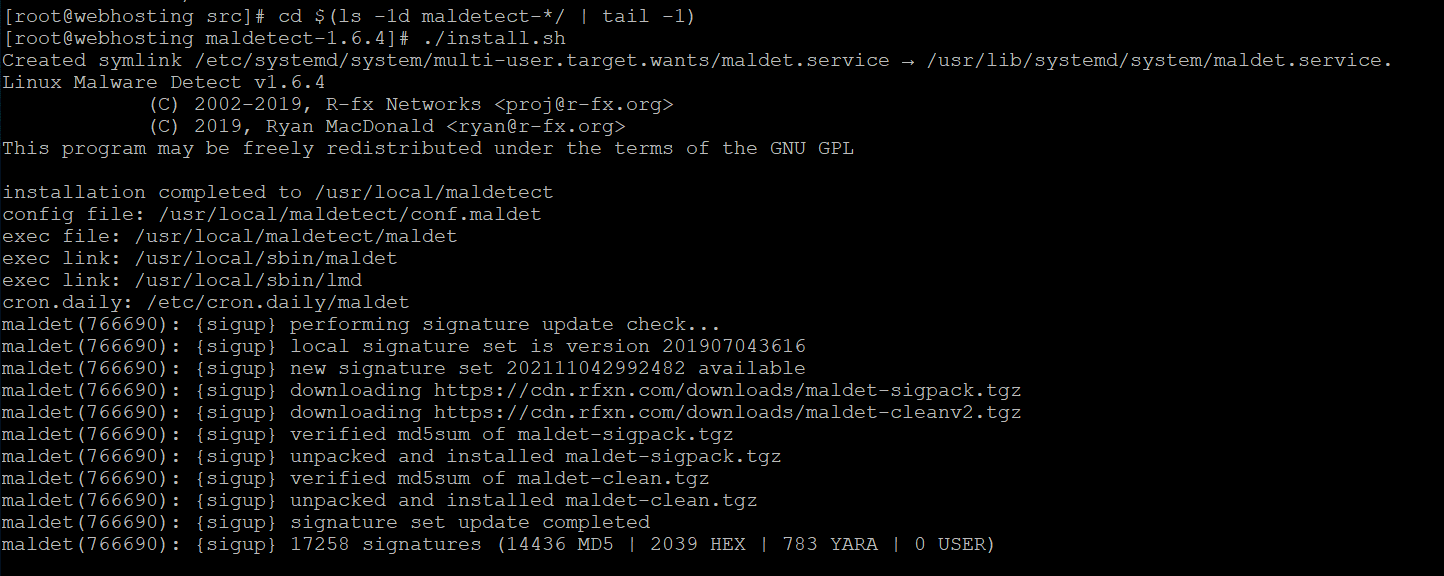
Add support for Malware. Expert definitions
echo "DatabaseCustomURL http://cdn.malware.expert/malware.expert.ndb" >> /etc/freshclam.conf
echo "DatabaseCustomURL http://cdn.malware.expert/malware.expert.hdb" >> /etc/freshclam.conf
echo "DatabaseCustomURL http://cdn.malware.expert/malware.expert.ldb" >> /etc/freshclam.conf
echo "DatabaseCustomURL http://cdn.malware.expert/malware.expert.fp" >> /etc/freshclam.conf
service freshclam restart
ls -la /usr/local/share/clamav/malware.expert.* /var/lib/clamav/malware.expert.*
Web analytics is an open-source analytic tool so Installing AWStats on DirectAdmin with CustomBuild 2.0 follow these steps:
cd /usr/local/directadmin/custombuild
./build set awstats yes
./build awstats
Image conversions are very popular due to new webp converter plugins for wordpress recommened it a lot. Installing Imagick with CustomBuild on DirectAdmin is very easy.
cd /usr/local/directadmin/custombuild
./build update
./build set imagick yes
./build imagick

If you used DirectAdmin before you might heard poralix before. They provide custom scripts for DirectAdmin.
If you use centos 7 or 8 you need to modify poralix settings becase defaults one now work with newer centos version.
We will install Memcached, Memcache extensions, GeoIP, PHP Redis
Install Memcache PHP Extensions for Memcached on Centos 8 follow these commands: (This is for DirectAdmin – Install Memcached for DirectAdmin)
Follow theesse commands:
mkdir -p /root/tools/poralix
cd /root/tools/poralix
wget -4 https://raw.githubusercontent.com/poralix/directadmin-utils/master/php/php-extension.sh -O php-extension.sh
chmod 750 php-extension.sh
./php-extension.sh install redis
./php-extension.sh install geoip  --beta
./php-extension.sh install memcached
./php-extension.sh install memcache --beta
If you get any error about libmemcached like :
- Error: Unable to find a match: libmemcached-devel
- memcached support requires libmemcached
- Unable to find memcached.h under /usr/include/libmemcached
- configure: error: no, libmemcached sasl support is not enabled. Run configure with –disable-memcached-sasl to disable this check
Please re-install pre-requirements on the first paragrapfh.
If your server has more than 2 cpu you shoul definitly enable pigz support for DirectAdmin. It will use all CPU threads when you
backup folders. It is very hand and time saver.
First, check you server CPU Threads with this command :
grep -c "processor" /proc/cpuinfoIf it is CPU thread is above 2 you can enable pigz support in DirectAdmin
As always we will use CustomBuild 2.0 for enabling pigz:
cd /usr/local/directadmin/custombuild
./build update
./build pigz
If you planning to use Letsencrypt in your DirectAdmin you have to add additional settings for DirectAdmin.
Firstly, you have to Verify SNI and Letsencrypt are enabled or not. if not please follow these commands:
Check current settings:
egrep 'enable_ssl_sni=|letsencrypt=' /usr/local/directadmin/conf/directadmin.confif it gets onyl letsencrypt entry, We need to enable both of them.
Before making changes lets copy our conf file:
cp /usr/local/directadmin/conf/directadmin.conf /usr/local/directadmin/conf/directadmin.conf.bakAdd enable_ssl_sni end of the DirectAdmin conf file :
echo "enable_ssl_sni=1" >> /usr/local/directadmin/conf/directadmin.conflets check again :
egrep 'enable_ssl_sni=|letsencrypt=' /usr/local/directadmin/conf/directadmin.conf
chown diradmin:diradmin /usr/local/directadmin/conf/directadmin.conf
if you want wildcard domain SSL certificate support via Let’s Encryptopen in new window, ensure dns_ttl=1 is set in the directadmin.conf.
echo "dns_ttl=1" >> /usr/local/directadmin/conf/directadmin.confWe need to apply changes so lets restart DirectAdmin:
echo "action=directadmin&value=restart" >> /usr/local/directadmin/data/task.queue; /usr/local/directadmin/dataskq d2000
Add the /.well-known Alias with custombuild:
cd /usr/local/directadmin/custombuild
./build rewrite_confs
Install the most recent version of the Letsencrypt with these commands :
cd /usr/local/directadmin/custombuild
./build update
./build letsencrypt
I have own a paid SSL certificate so i upload my SLL files to : /usr/local/directadmin/conf
and edit directadmin.conf
nano /usr/local/directadmin/conf/directadmin.confthis is my ssl settings with cutom SSL Certificate
ssl=1
force_hostname=webhosting.domain.com
ssl_redirect_host=webhosting.domain.com
cacert=/usr/local/directadmin/conf/server.crt
cakey=/usr/local/directadmin/conf/server.key
carootcert=/usr/local/directadmin/conf/server.ca
After that restart directadmin
service directadmin restart
you can use directadmin with SSL
Phpmyadmin ssl settings on DirectAdmin
Phpmyadmin use SSL files with Apache so Install your SSL files in /etc/httpd/conf/
/etc/httpd/conf/ssl.crt/server.ca
/etc/httpd/conf/ssl.crt/server.crt
/etc/httpd/conf/ssl.crt/server.crt.combined

/etc/httpd/conf/ssl.key/server.key
Inside of the ssl.crt folder dhparams.pem should be there. It is default so don’t delete it.
phpmyadmin use apache conf you can check this config file:
nano /etc/httpd/conf/extra/httpd-ssl.conf
server.crt.combined and server.crt are the same file bot different name. Directadmin creates user’s nginx file
and point their ssl settins : server.crt.combined. Thats why I have both file different name.
Also Apache use /etc/httpd/conf/ssl.crt/server.crt.combined on created new httpd.conf file for domains. I’dont know why.
/etc/httpd/conf/ssl.crt/server.crt.combined contains in order:
SSL CERTIFICATE.txt
AlphaSSL Intermediate CA.txt
Root Certificates.txt
it is same as server.crt
https://forum.directadmin.com/threads/ssl-location-is-different-apache-cant-restart.64932/
After all settings set up :
service httpd restart
service directadmin.service restart
Install CSF Firewall for DirectAdmin
CSF Firewall is easy to use rather than Firewalld. Thus, We will remove Firewalld and install CSF Firewall on Centos 8.
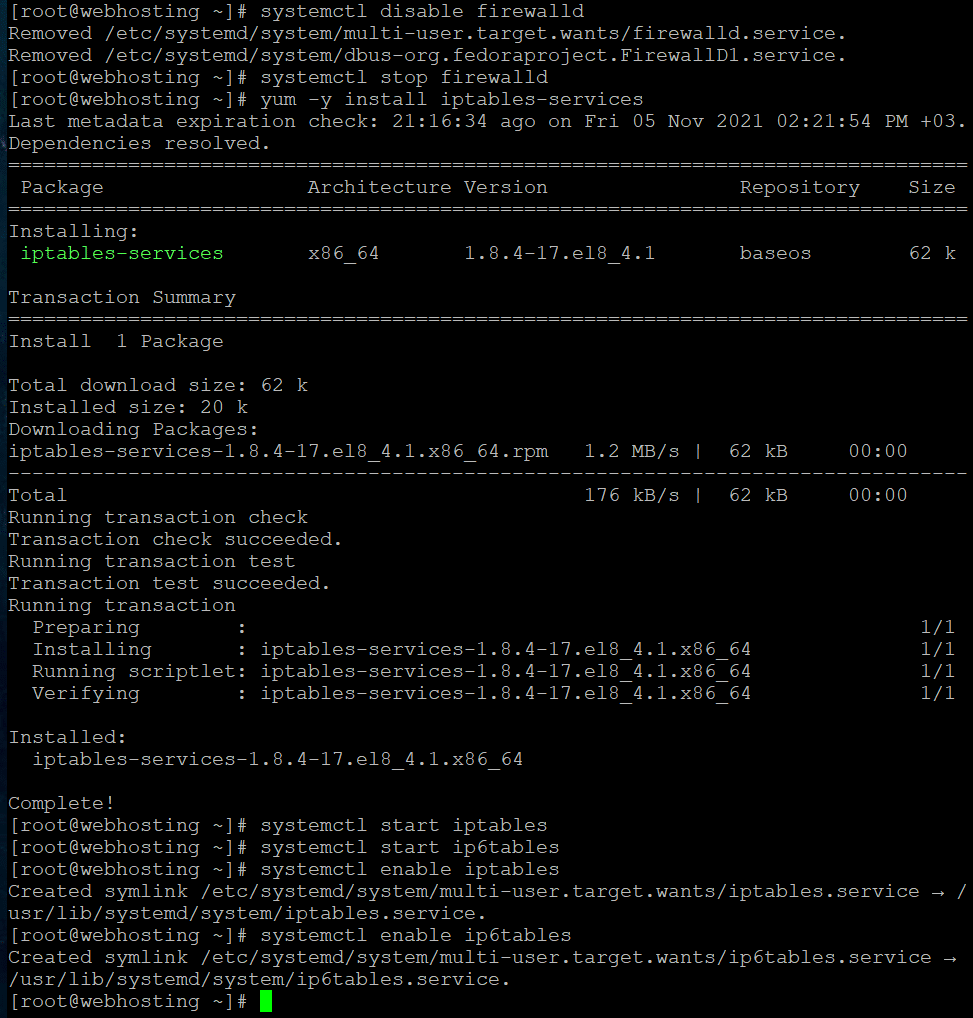
removing firewalld:
systemctl disable firewalld
systemctl stop firewalld
Install iptables:
yum -y install iptables-services
systemctl start iptables
systemctl start ip6tables
systemctl enable iptables
systemctl enable ip6tables
We will use CSF Firewall with Brute Force Monitor (BFM). We need to add BFM support to CSF Firewall in order to use that.
You rememver poralix right? Lets use their csf-bfm-install.sh script to install it :
mkdir -p /root/tools/poralix
cd /root/tools/poralix
wget -4 -O csf-bfm-install.sh https://raw.githubusercontent.com/poralix/directadmin-bfm-csf/master/install.sh
chmod 700 csf-bfm-install.sh
./csf-bfm-install.sh
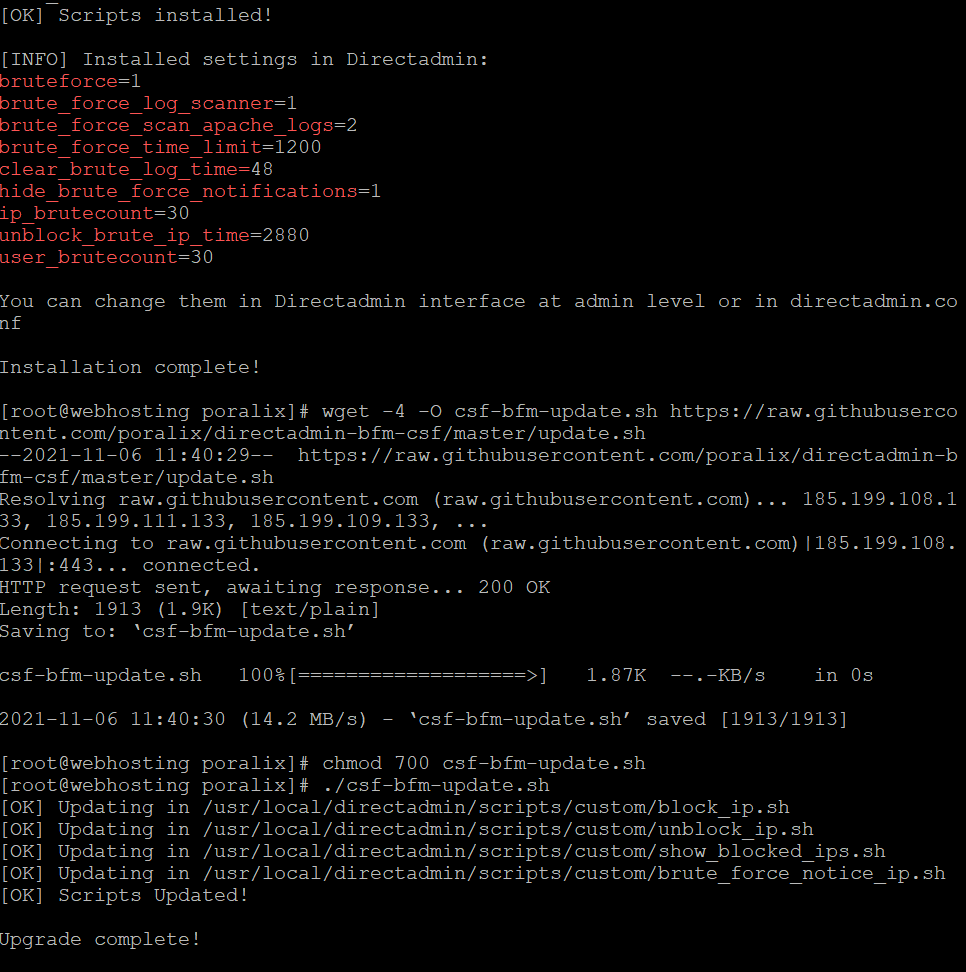
To upgrade using Poralix’s script:
mkdir -p /root/tools/poralix
cd /root/tools/poralix
wget -4 -O csf-bfm-update.sh https://raw.githubusercontent.com/poralix/directadmin-bfm-csf/master/update.sh
chmod 700 csf-bfm-update.sh
./csf-bfm-update.sh
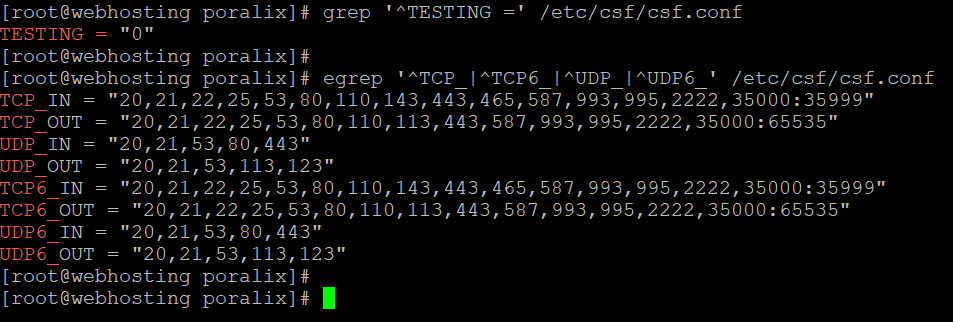
check if testing is neabled ?
grep '^TESTING =' /etc/csf/csf.conf
also check the ports
Inspecting whitelisted CSF Firewall ports
egrep '^TCP_|^TCP6_|^UDP_|^UDP6_' /etc/csf/csf.conf
Output:
Check CSF Firewall profile backup
csf --profile listcreate a backup
csf --profile backup after-csf-bfm-installCheck CSF Firewall profile backup again
csf --profile list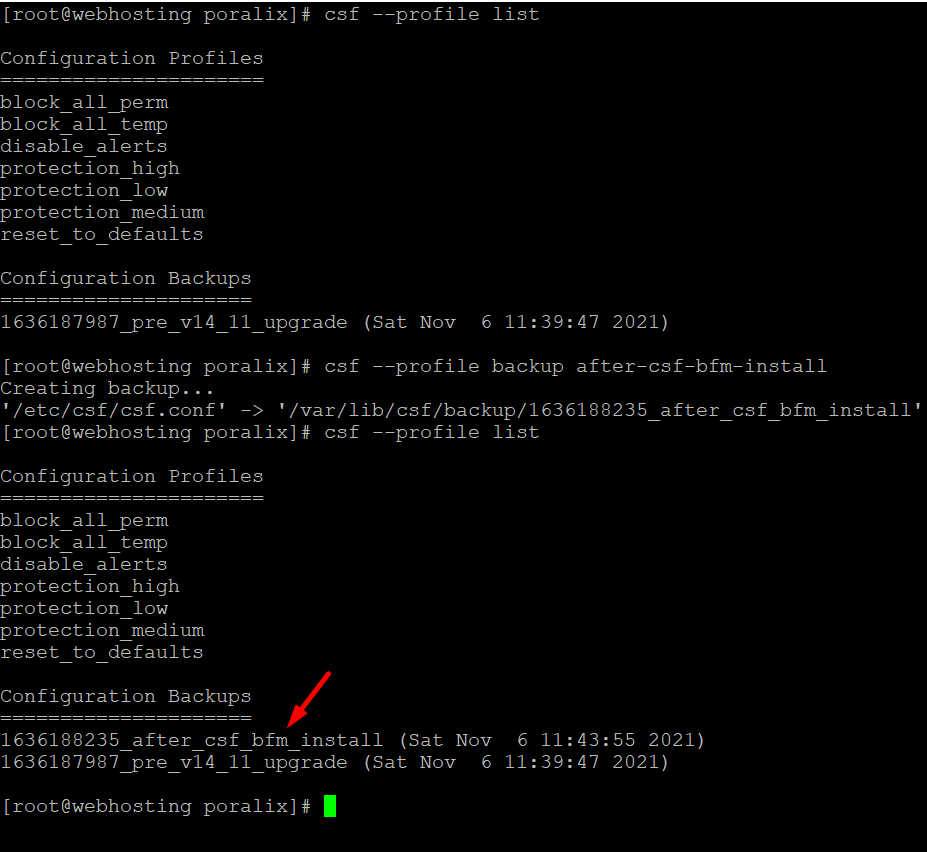
Finally ensure, CSF Firewall and LFD daemon starts up on server reboots
chkconfig lfd on
chkconfig csf on
Double check CSF Firewall works via csftest.pl
perl /etc/csf/csftest.pl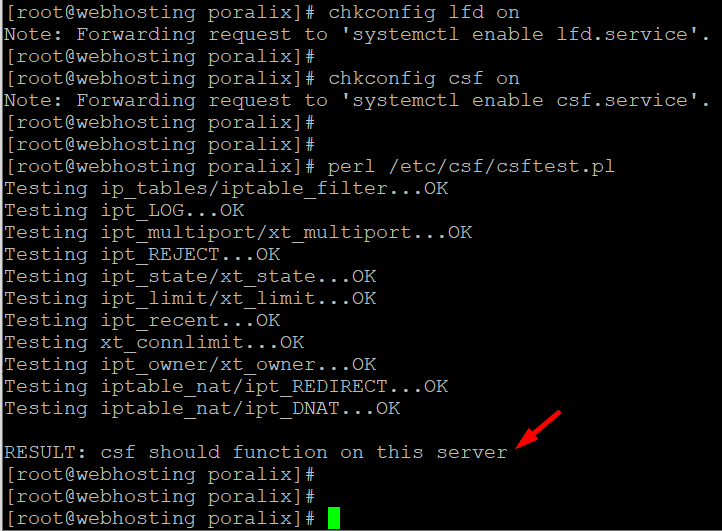
after installing it
check the config file :
cat /root/directadmin-bfm-csf.confIf it is not created, create one:
nano /root/directadmin-bfm-csf.confUSE_PORT_SELECTED_BLOCK="1";
CSF_GREP_API_CALL="0";
DEBUG="0";
FTP_PORTS="20 21";
SSH_PORTS="22";
WEB_PORTS="80 443";
EXIM_PORTS="25 465 587";
DOVECOT_PORTS="110 143 993 995";
DIRECTADMIN_PORTS="2222";
If you change the default DirectAdmin port don’t forget to change it with your own port number.
DIRECTADMIN_PORTS="you port number";You will get a lot of IP attacks so If you want to block a IP to access your all ports enable this command :
USE_PORT_SELECTED_BLOCK="0";A large number of attacker IPs will consume your server’s power. We will use IPSET to lower that consumption. IPSET support is disabled on directAdmin. If your Linux server kernel version support IPSET you should follow these steps:
Check IPSET settings:
grep -w '^LF_IPSET' /etc/csf/csf.conf
LF_IPSET = "0"
Here a script to check If your server’s Linux Kernel supports IPSET.
nano csf_ipset.sh
#!/bin/bash
#####################################################
# CSF Firewall IPSET configuration for DirectAdmin
# routine partially borrowed from centminmod.com
# CSF Firewall setup
######################################################
KERNEL_NUMERICVER=$(uname -r | awk -F. '{ printf("%d%03d%03d%03d\n", $1,$2,$3,$4); }')
ipset_setup() {
  if [[ ! -f /usr/sbin/ipset ]]; then
    # CSF now has ipset support to offload large IP address numbers
    # from iptables so uses less server resources to handle many IPs
    # does not work with OpenVZ VPS so only implement for non-OpenVZ
    yum -q -y install ipset ipset-devel
    sed -i 's/LF_IPSET = \"0\"/LF_IPSET = \"1\"/' /etc/csf/csf.conf
  elif [[ -f /usr/sbin/ipset ]]; then
    sed -i 's/LF_IPSET = \"0\"/LF_IPSET = \"1\"/' /etc/csf/csf.conf
  fi
}
if [[ ! -f /proc/user_beancounters ]] && [[ "$(uname -r | grep linode)" || "$(find /lib/modules/`uname -r` -name 'ipset')" ]]; then
  ipset_setup
elif [[ -f /proc/user_beancounters && "$KERNEL_NUMERICVER" -ge '3000000000' ]]; then
  # openvz7's 3.10 linux kernels support IPSET
  ipset_setup
fi
chmod +x csf_ipset.sh
./csf_ipset.sh
Lets check LF_IPSET setting is enabled = 1 or not :
grep -w '^LF_IPSET' /etc/csf/csf.conf
LF_IPSET = "1"
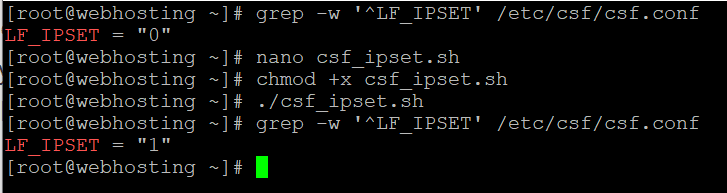
As the image shows we enabled IPSET on our server. We can now increse CSF Firewall IP address limits because it is now handle much more IP datas.
sed -i 's/^DENY_IP_LIMIT = .*/DENY_IP_LIMIT = \"3000\"/' /etc/csf/csf.conf
sed -i 's/^DENY_TEMP_IP_LIMIT = .*/DENY_TEMP_IP_LIMIT = \"3000\"/' /etc/csf/csf.conf
After these settings restart your CSF Firewall
csf -raCloudflare Settings in DirectAdmin
If you use Cloudflare as much as I do, You should follow these steps. We need to whitelist Cloudflare’s IP addresses so CSF Firewall doesn’t block them. We will use the Centmin Mod LEMP stack script for this. The script will fetch Cloudflare latest IPs and add them to Whitelist.
Follow these steps:
mkdir -p /root/tools
cd /root/tools
wget -4 -O /root/tools/csfcf.sh https://github.com/centminmod/centminmod/raw/123.09beta01/tools/csfcf.sh
chmod 700 /root/tools/csfcf.sh
# run once to whitelist CF IPs
/root/tools/csfcf.sh apache /root/tools/csfcf.sh auto-apache
Script creates httpd-includes-remoteip.conf file that contains cloudfalre IPs.We need to manually add that config for apache settings.
Open /etc/httpd/conf/extra/httpd-includes.conf :
nano /etc/httpd/conf/extra/httpd-includes.conf
add this line:
Include /etc/httpd/conf/extra/httpd-includes-remoteip.confAfter that check, if everything is ok:
httpd -t
Syntax OK
Then don’t forget to restart Apache
service httpd restartAlso add a crontab for regular check new CloudFlare IP Addresses.
23 */12 * * * /root/tools/csfcf.sh auto-apache >/dev/null 2>&1Also I regularly back up my directadmin backups:
DirectAdmin Backup Remover
#!/bin/sh

backup_directory="/home/admin/admin_backups" # No trailing /
backup_time="1" # Remove backups how many days old? Number variable only!

#### Commands ####

find_files=$(find $backup_directory/* -maxdepth 0 -mtime +$backup_time)

#### Begin Script ####

##

echo ""
echo "Looking for old backups... Older then $backup_time days old."
echo "----"
if [ -z "$find_files" ]; then
echo "None Found!"
else
echo "$find_files"
fi
echo "----"
echo ""
echo "If any folders were found they have deleted."
find $backup_directory/* -maxdepth 0 -mtime +$backup_time -exec rm -rv {} +
echo ""
echo "Done."
echo ""
Create a Cronjob :
5 0 * * * /root/backup_remover.sh > /var/logs/backup_remover_`date +\%d-\%m-\%Y_\%H-\%M`.log 2>&1
It will output logs in /var/logs/
If you have any questions just ask.
Resources:
George from https://centminmod.com/ Thank you.